Need help with changing the region on your iPhone to unlock a treasure trove of new apps and features? You're not alone. Whether you're relocating or exploring content from different corners of the globe, this guide is here to help.
With simple, step-by-step instructions, we'll walk you through the process, ensuring you can easily and confidently tailor your iPhone experience to your current needs. Let this article be your roadmap to a world of new possibilities.
How to Change Region/Country on Your iPhone or App Store
When we talk about changing the region on your iPhone, we mean adjusting the country or region associated with your Apple ID. This modification impacts the App Store and all applications you utilize linked to your Apple ID. It's crucial to recognize that this action is a significant procedure involving your Apple account. You can't alter your country or region simply by tweaking language settings.
Preparatory Steps Before Changing Your Country or Region
Before updating your region information on your Apple ID, several preparatory steps are essential to ensure a smooth transition:
Spend any remaining Apple ID Balance: Before proceeding, you must use any existing balance linked to your Apple ID and credits of your iCloud account. To check your balance, visit your Apple account details.
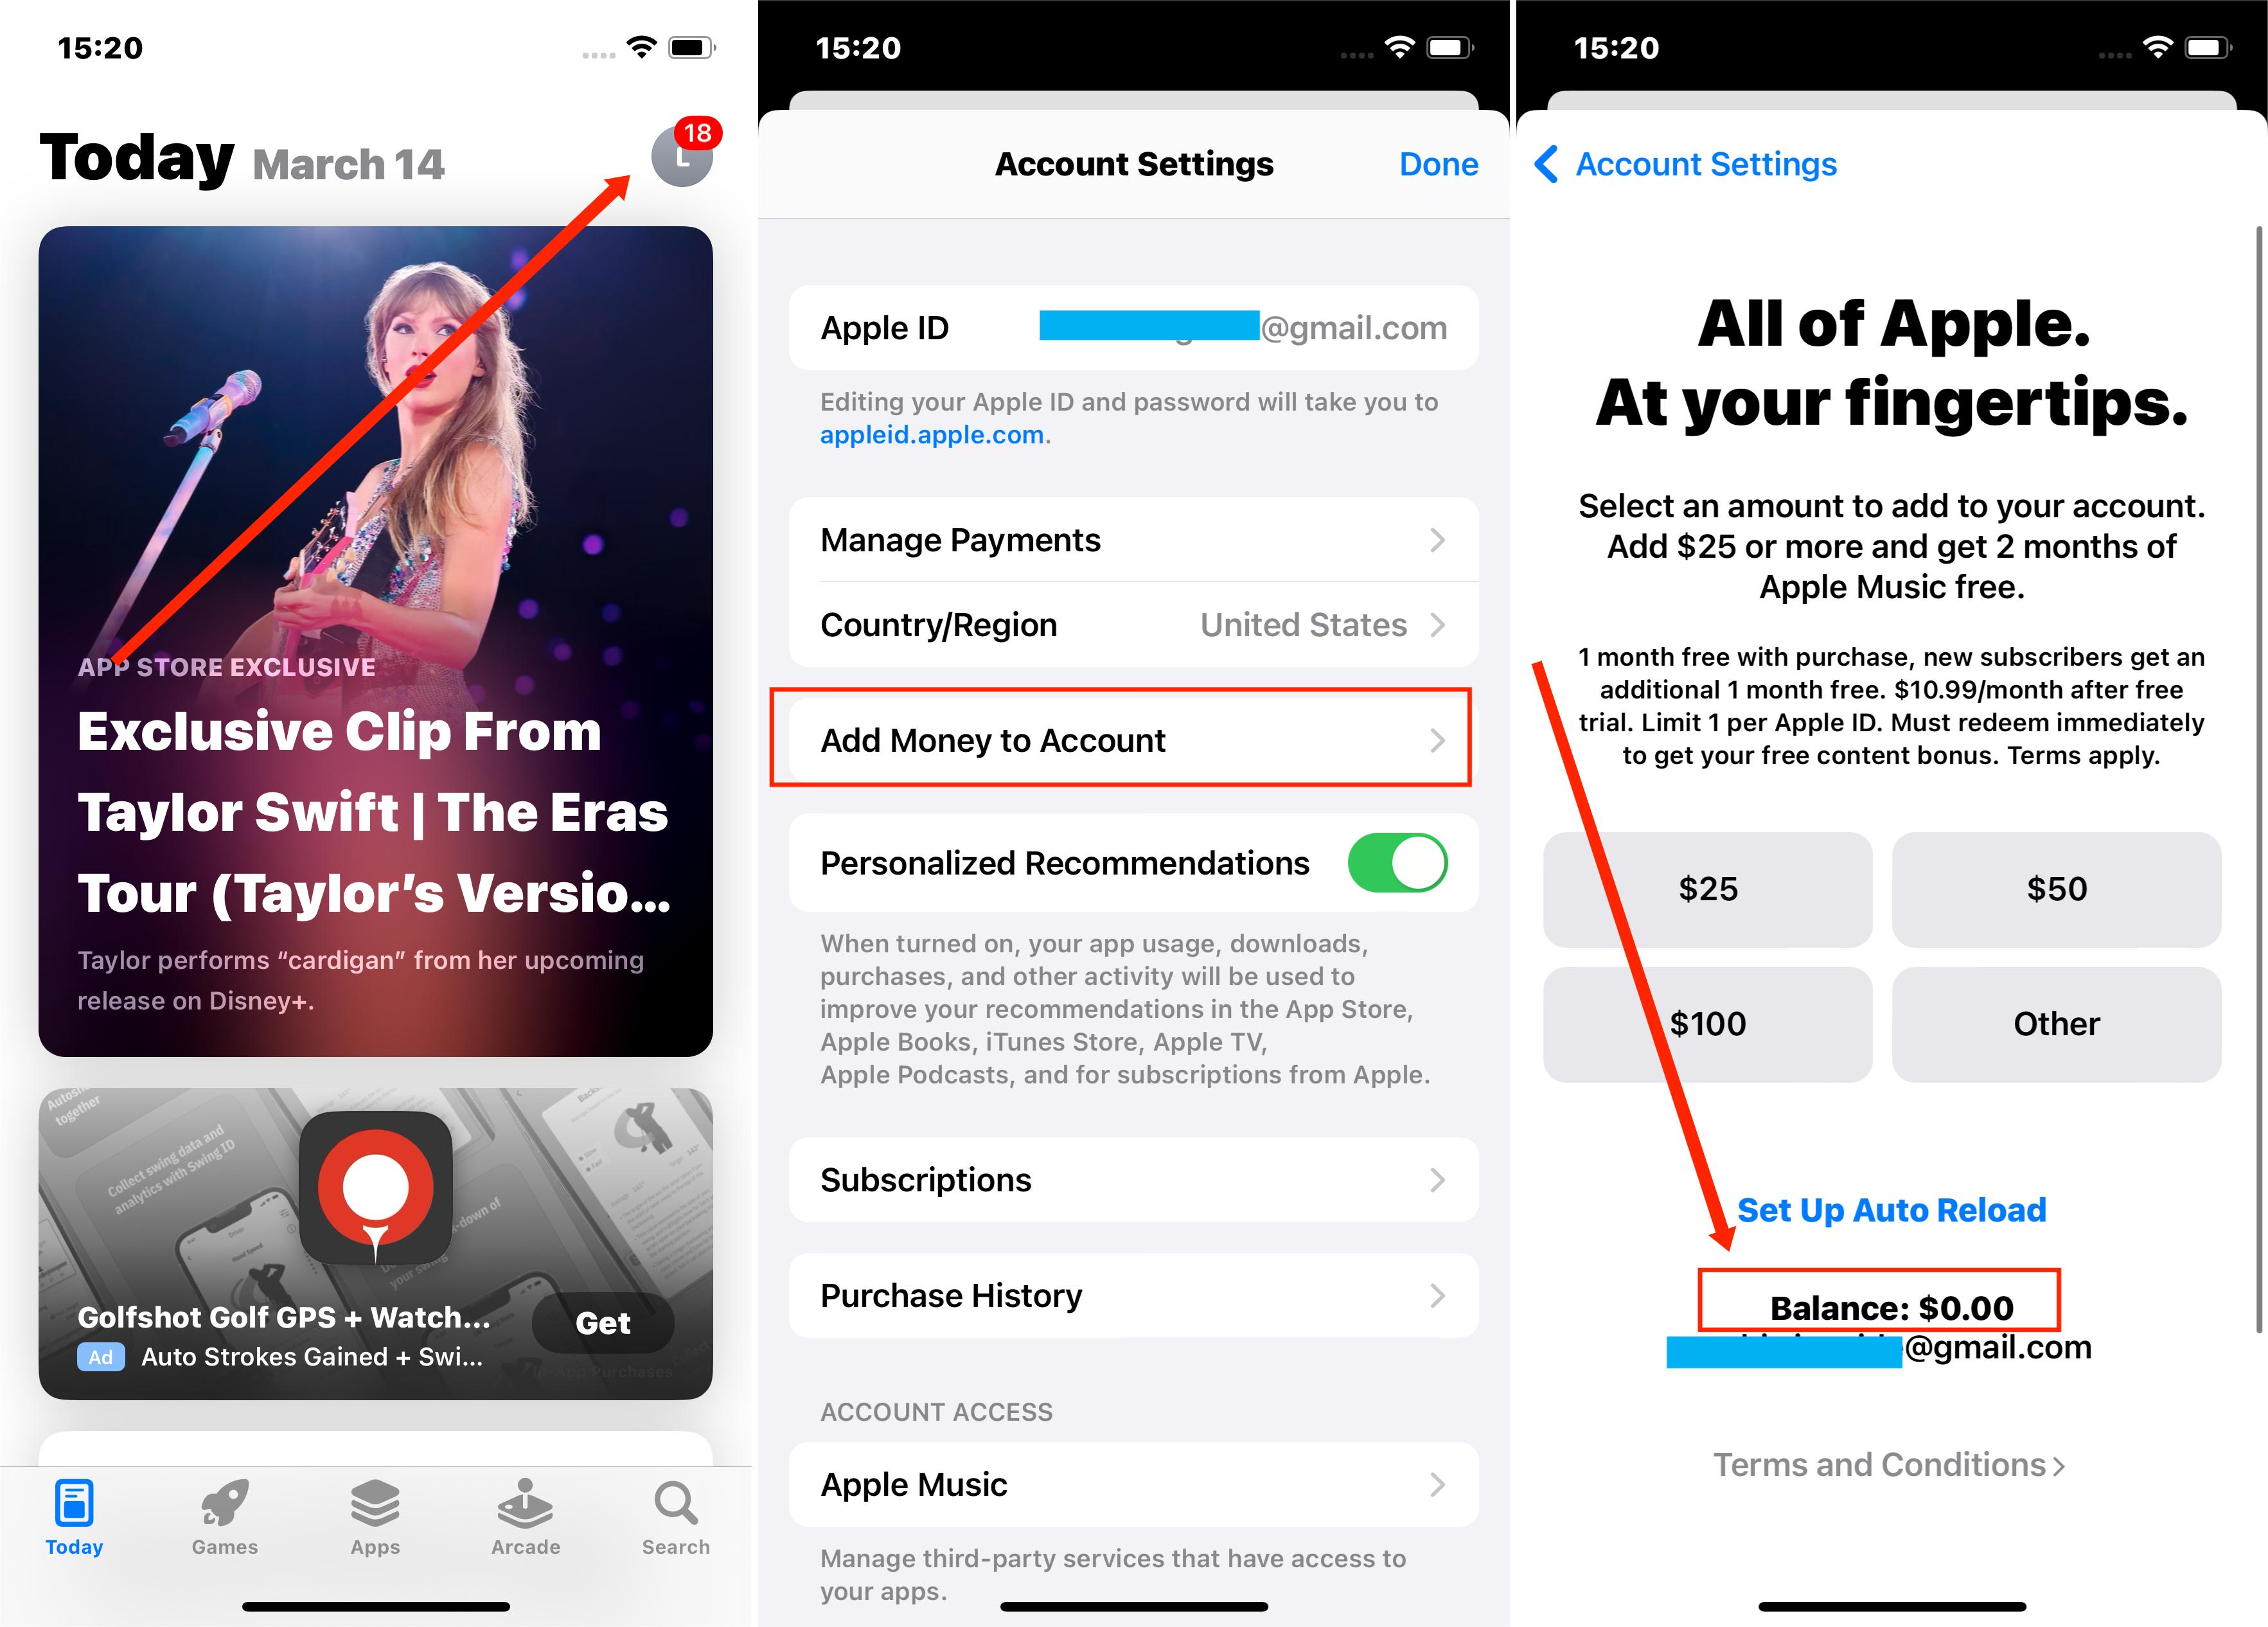
Cancel Region-specific Subscriptions: Identify and cancel any subscriptions hindering the region change process. Ensure to continue after the subscription period ends.
Complete Any Pending Transactions: Wait for the conclusion of any ongoing memberships, pre-orders, movie rentals, or Season Passes. Also, ensure any pending store credit refunds are processed.
Prepare a New Payment Method: Ensure you provide a legitimate billing address and payment method for the new region. Familiarize yourself with acceptable payment methods for the new locale.
Redownload Content: To retain access to your apps, music, movies, TV shows, and books, redownload them for future use. Be mindful that some content may not be accessible in your new region.
Update iCloud Billing and Payment: After changing your Apple ID's billing address, adjust your iCloud+ plan according to the new region's pricing.
Understand Family Sharing Constraints: If you're part of a Family Sharing plan situated in a different country from other members, changing your App Store country might not be viable.
Note:
After ensuring you are prepared for the transition by following the necessary steps, you can change your Apple ID country or region.
There are various methods to do this, each suited to different devices. Below, we outline the steps to adjust your Apple ID's country or region using your iPhone, iPad, Windows PC, Mac, or even online.
Way 1 Change Your Apple ID Country or Region Use Your iPhone or iPad
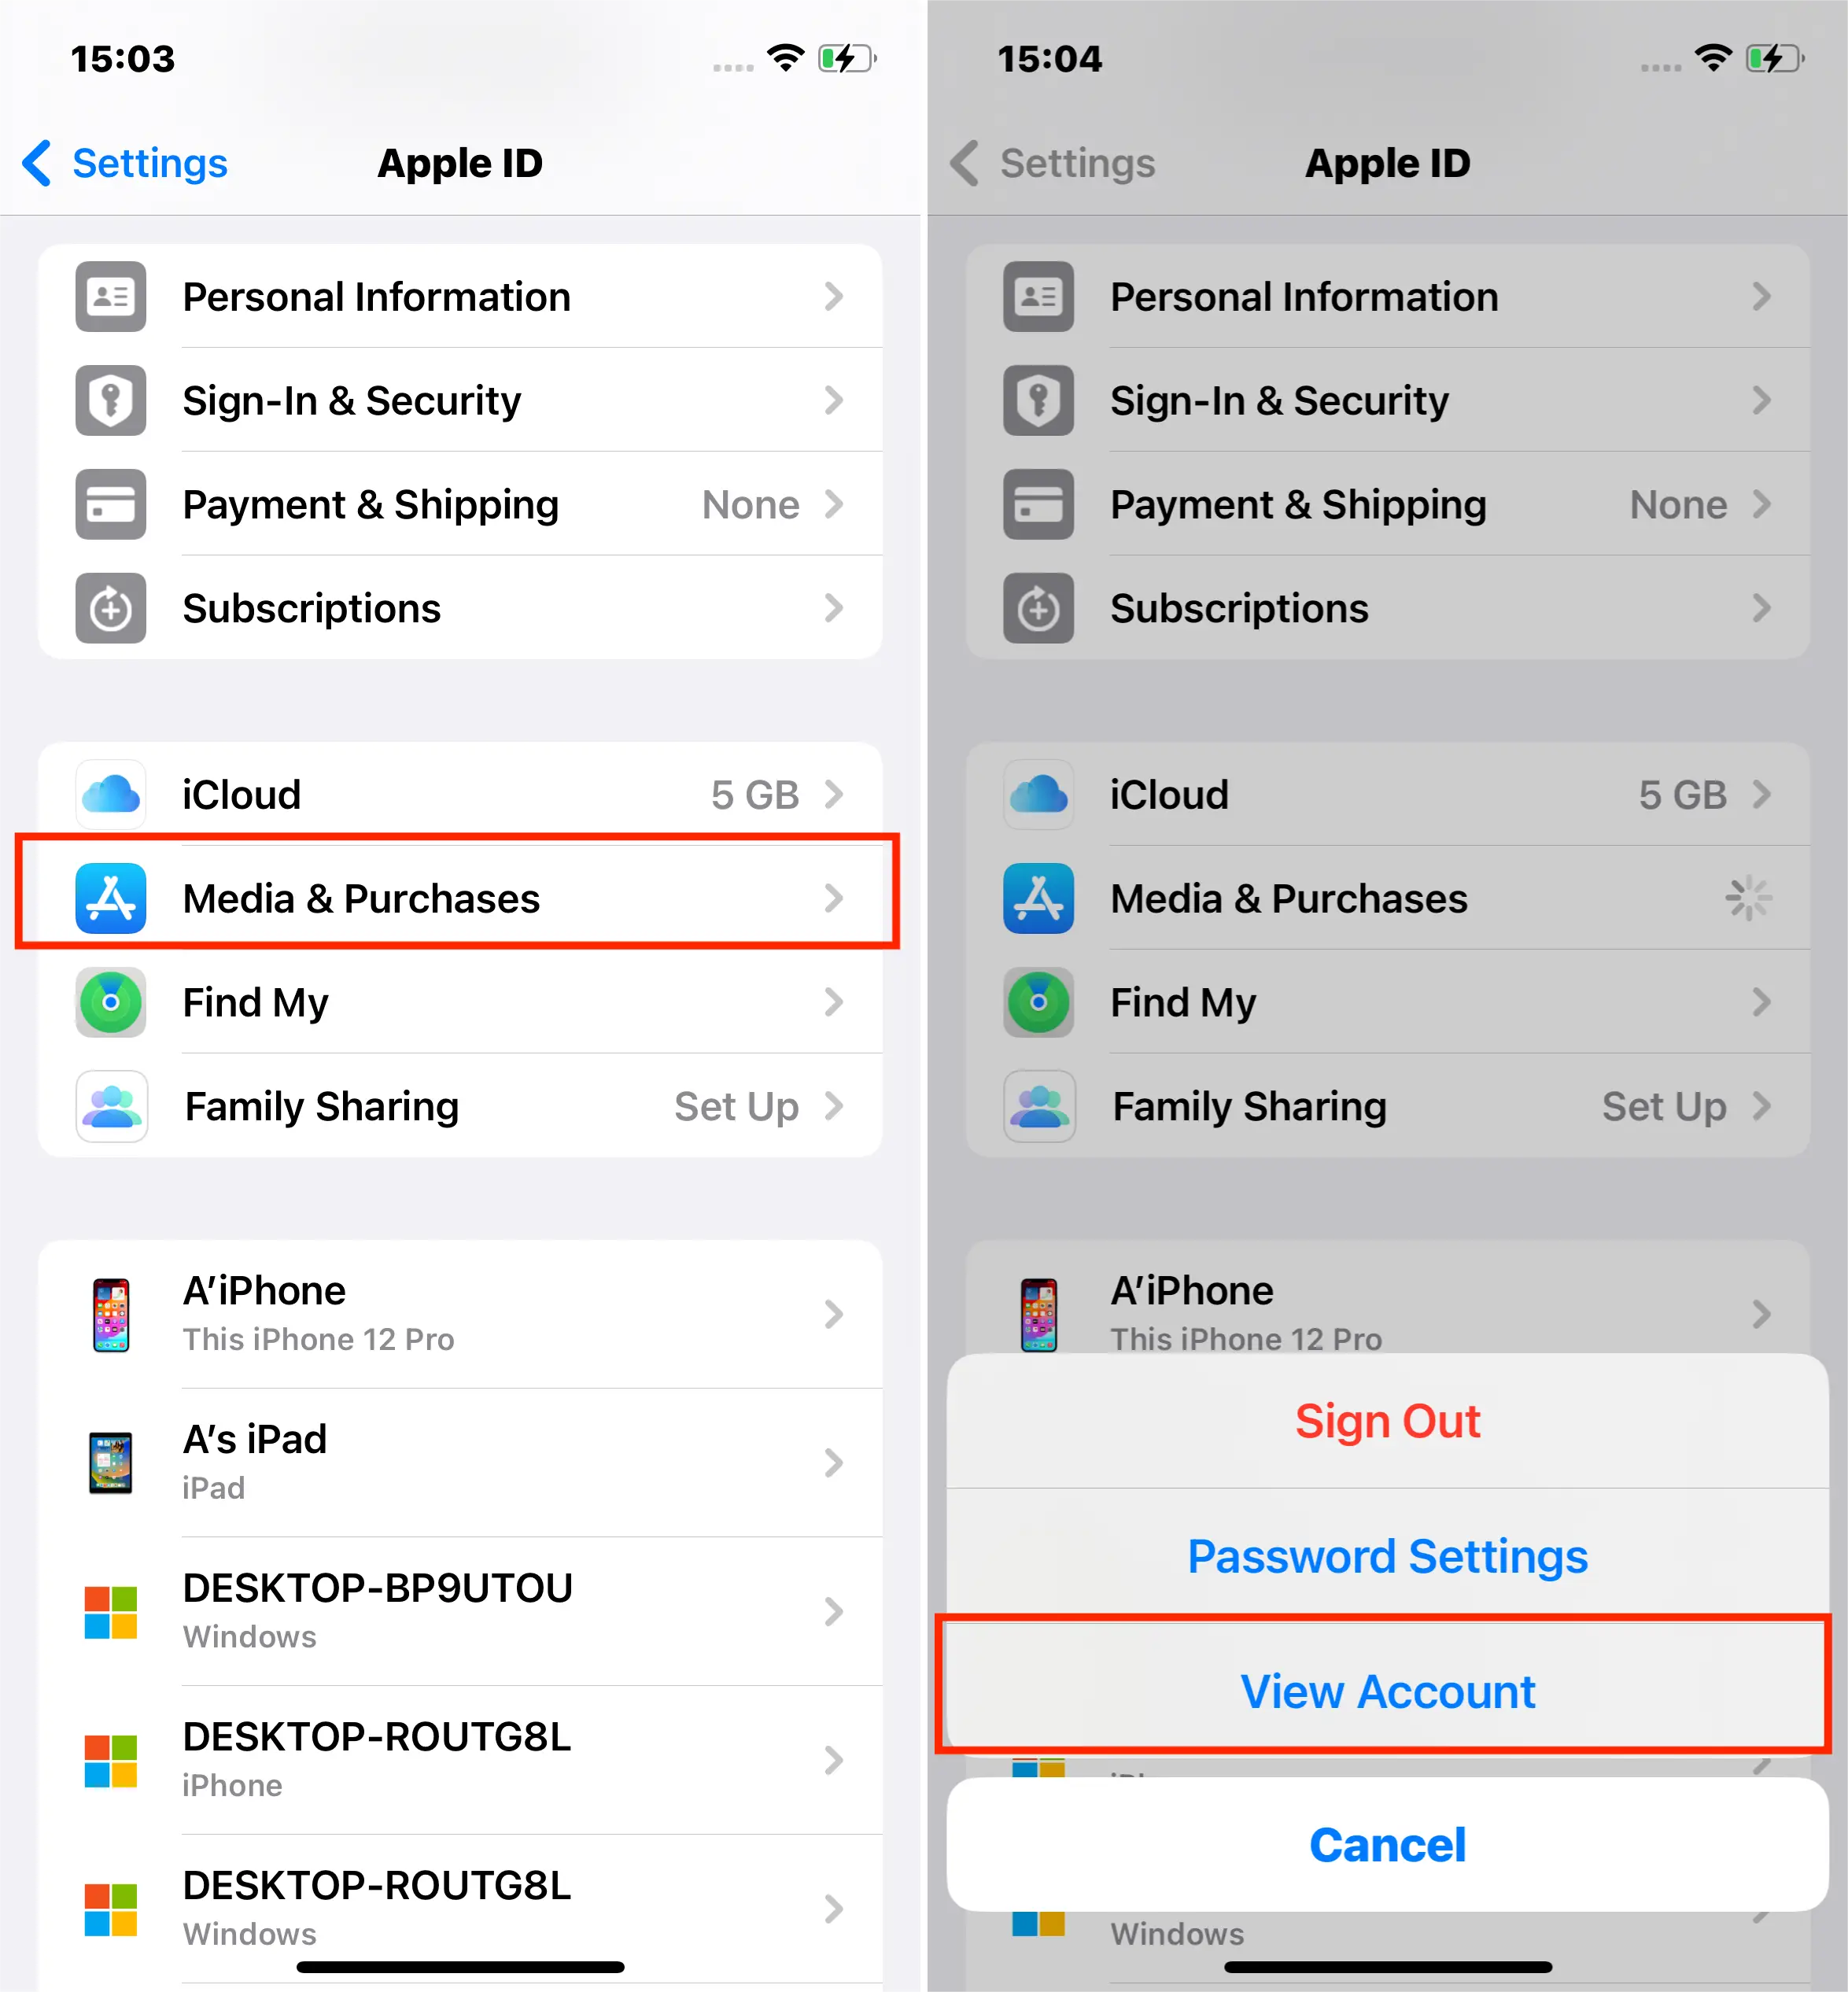
Open the Settings app on your device.
Tap on your name, then select Media & Purchases.
Choose View Account, and you may need to sign in now.
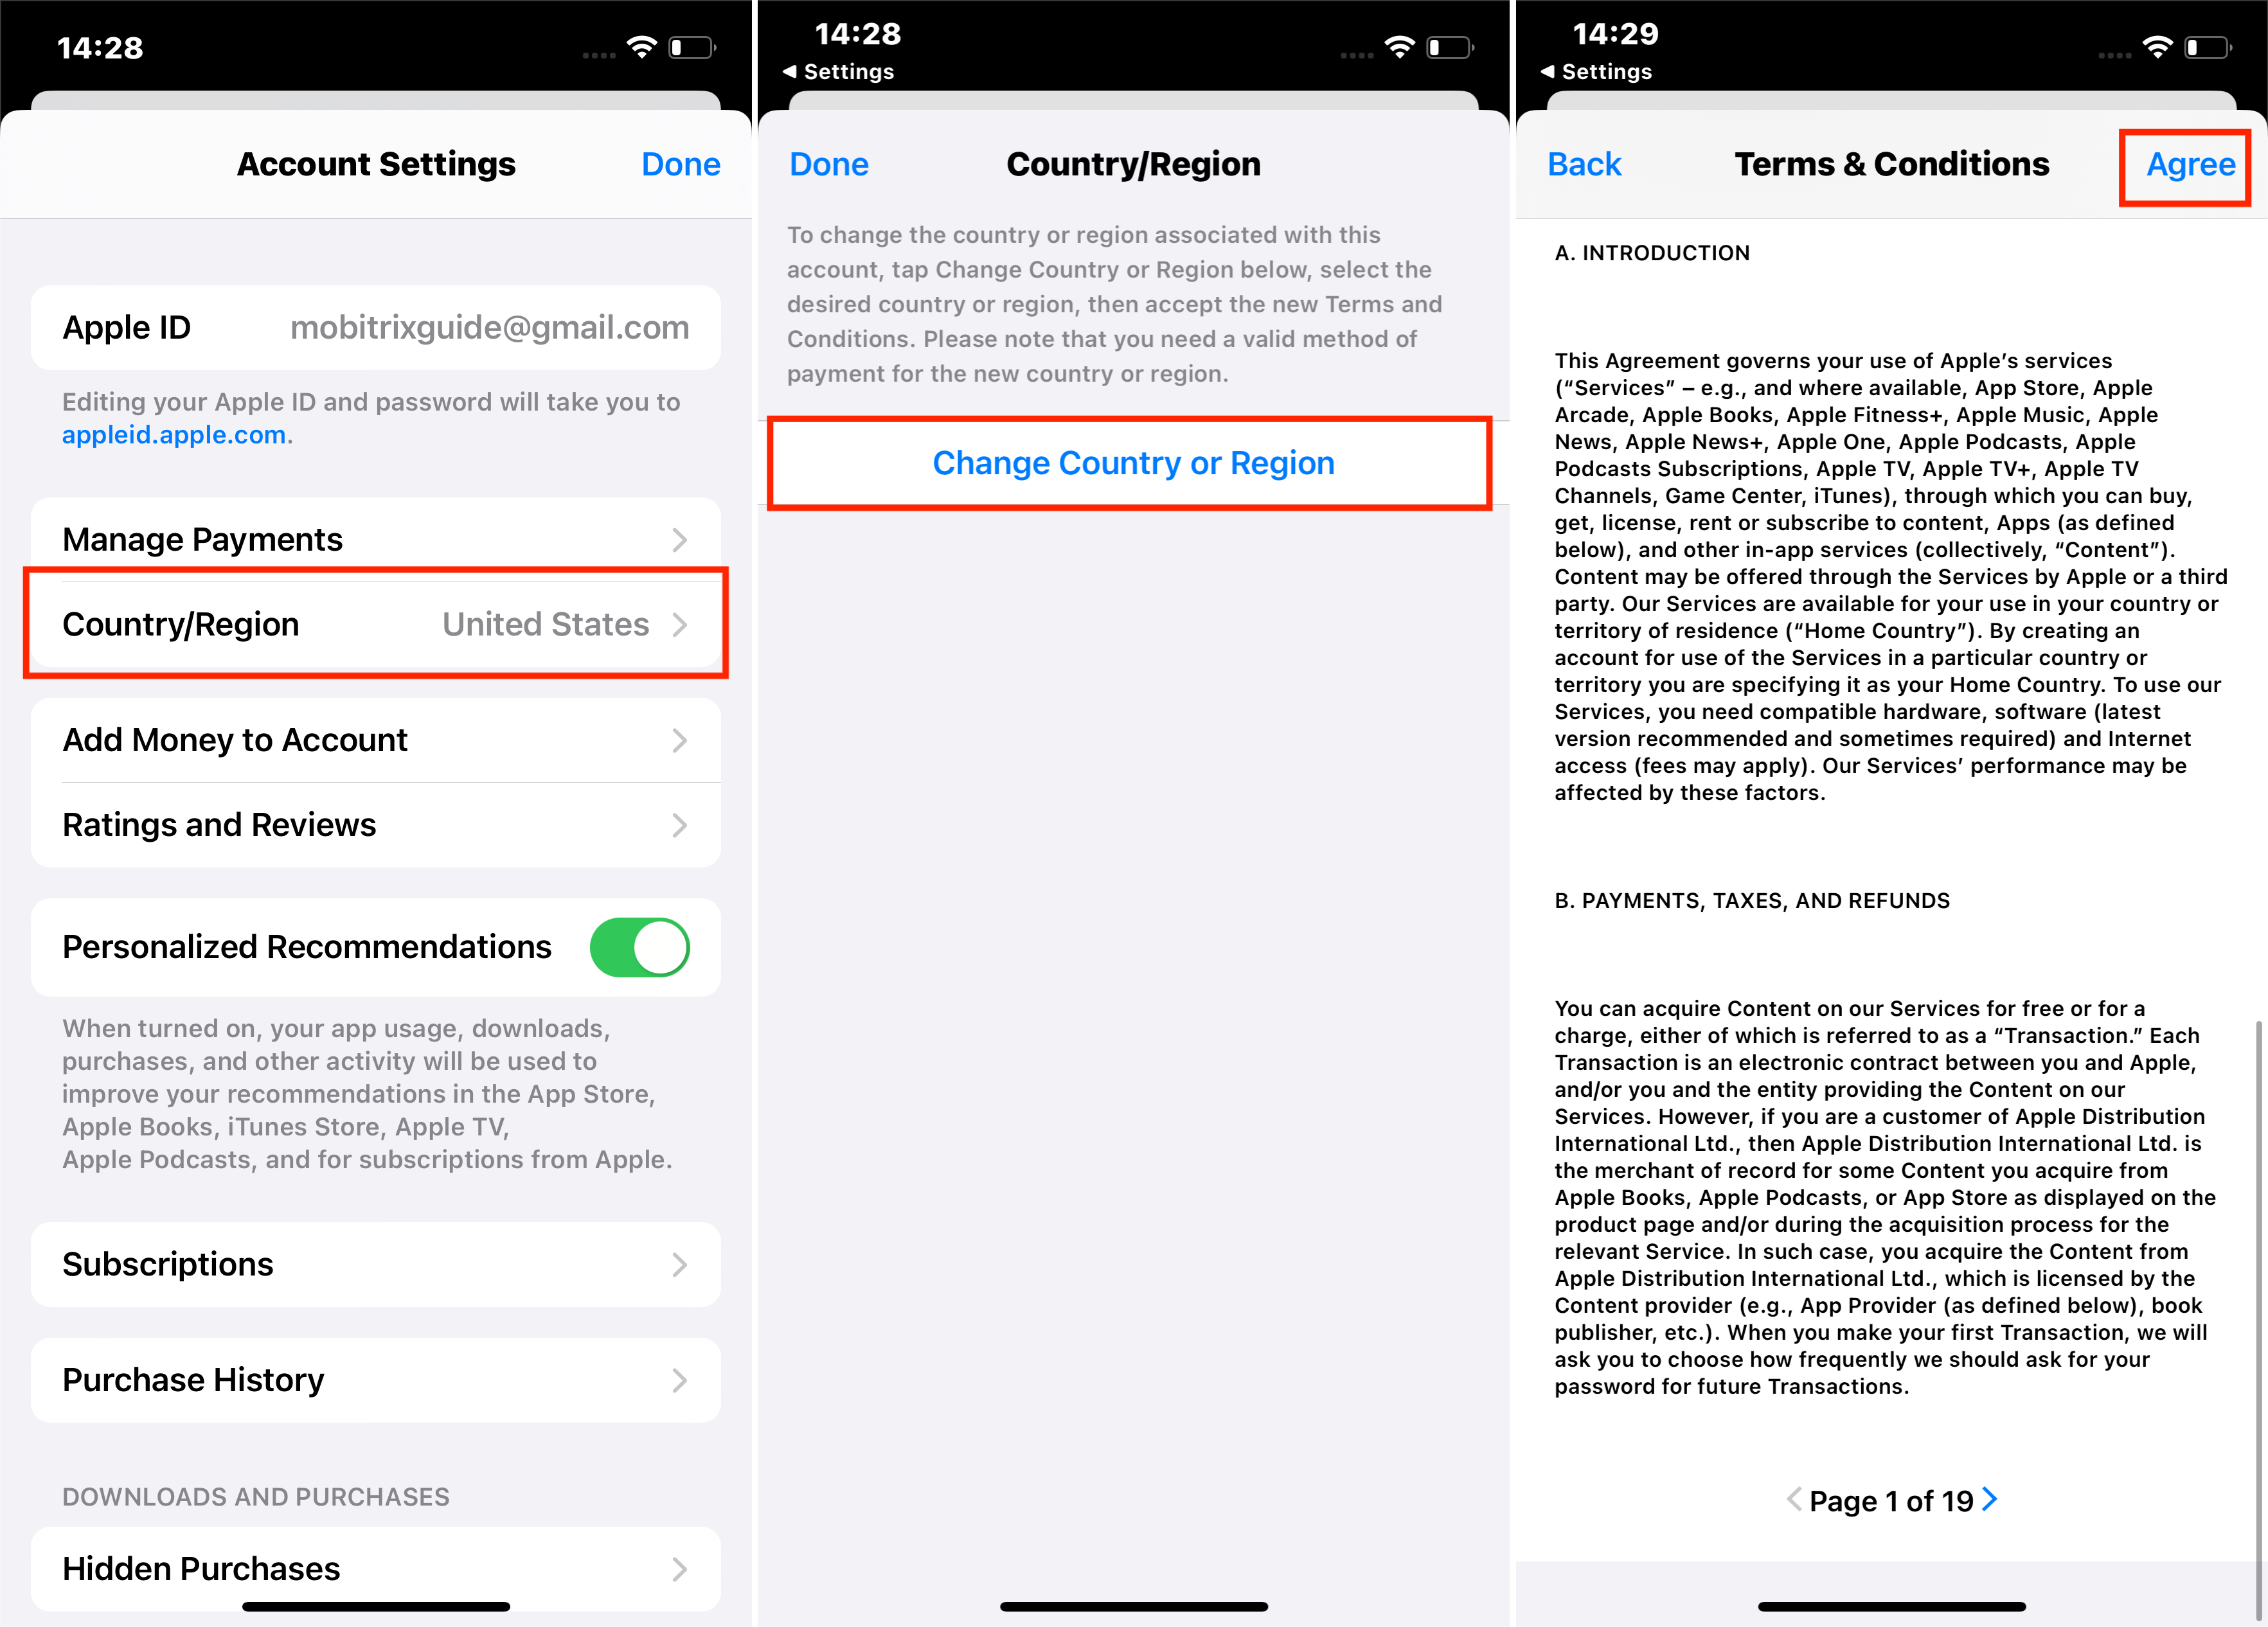
Select Country/Region, then tap Change Country or Region.
Pick your new country or region from the list, then read the Terms & Conditions.
Tap Agree in the upper-right corner, then tap Agree again to confirm your acceptance.
Now, select a payment method, fill in your new payment information and billing address, and tap Next. Remember, the payment method must be valid for your new region.
Q&A
Q: Is it necessary to update the country settings on each of my devices individually?
A: No, it's not required. Once you change the country setting on one device connected to your iCloud account, this change will sync across all devices using the same Apple ID, updating the app availability and settings accordingly.
Way 2 Use Your Windows PC to Change iPhone Region
Open either the iTunes, Apple Music or Apple TV app on your Windows PC.
Click your name at the bottom of the sidebar, then click View My Account.
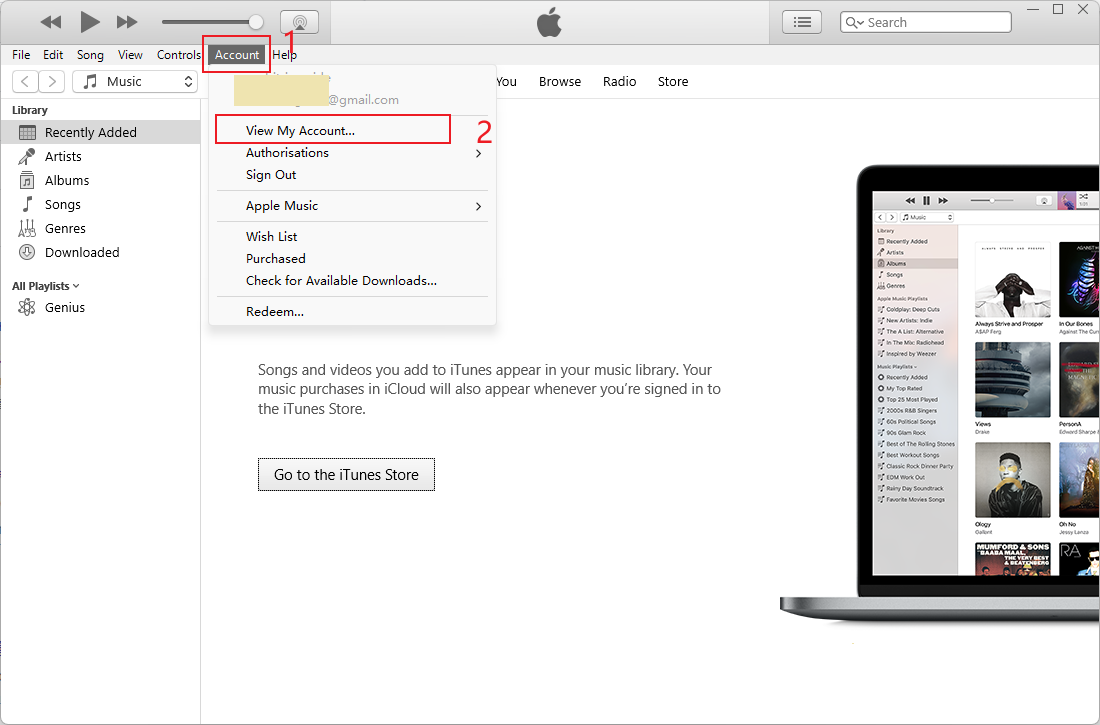
You might need to log in with your Apple ID here.
On the Account Information page, click Change Country or Region.
Select your desired country or region.
Carefully read the Terms & Conditions and click Agree. Click Agree once more to confirm.
Enter your new payment information and billing address, then click Continue.
Tips:
App Availability Concerns: Note that changing regions may affect app functionality. Some apps might stop working, vanish from your device, or cease to receive updates. This also pertains to books, music, TV shows, and films.
Consider Currency and Pricing Changes: Transitioning countries can lead to different pricing due to currency changes. Assess this aspect to avoid unexpected costs.
Way 3 Use Your Mac to Change Region or Country on iPhone
The steps to change your region on a Mac are similar to those on a Windows PC:
Open the iTunes/Finder, Apple Music or Apple TV app.
In the menu bar, select iTunes Store > Account Infromation (sometimes you need to go to Account Settings.)
Sign in with your Apple ID when prompted.
On the Account Information page, opt for Change Country or Region.
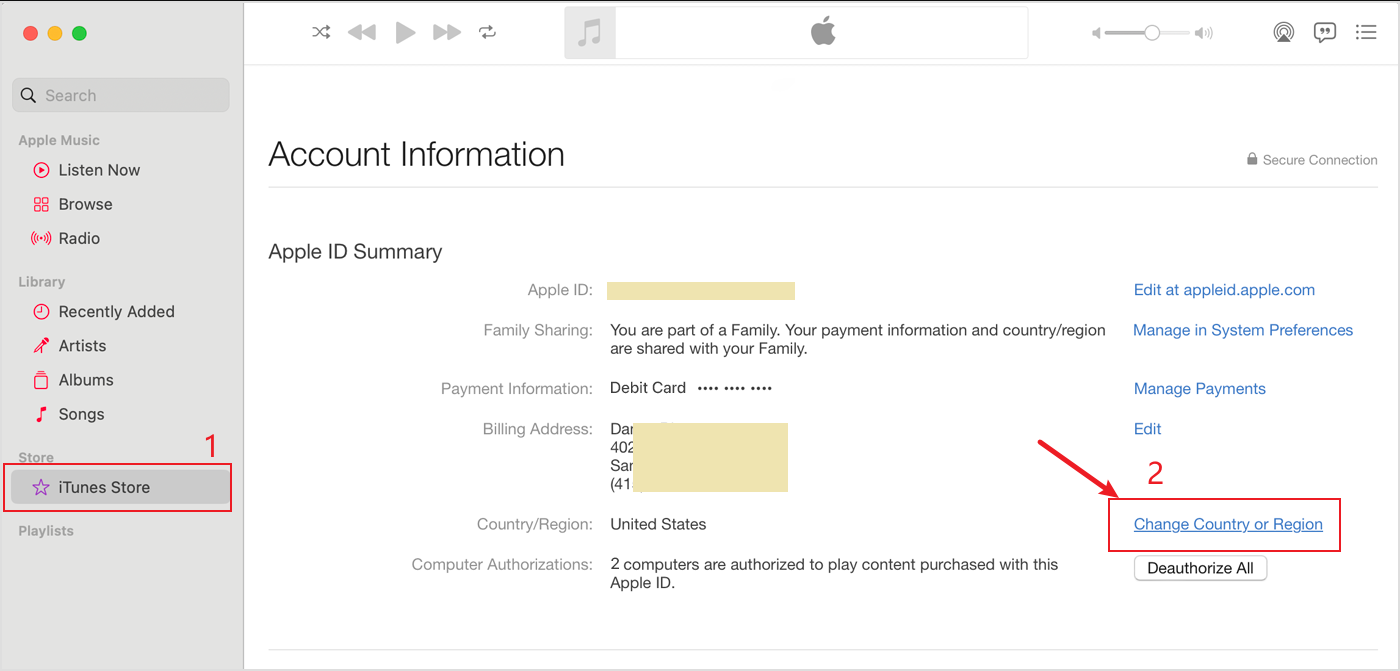
Choose your new country or region.
Agree to the Terms & Conditions twice to confirm.
Update your payment details and billing address, then click Continue.
Q&A
Q: Can I alter my iPhone's location without modifying the Apple ID region?
A: Yes, you can adjust your iPhone's location independently using tools like location spoofers, such as LuckLuckGo, or by employing a VPN service.
Way 4 Change Your iPhone Region Online
Visit the website appleid.apple.com and sign in.
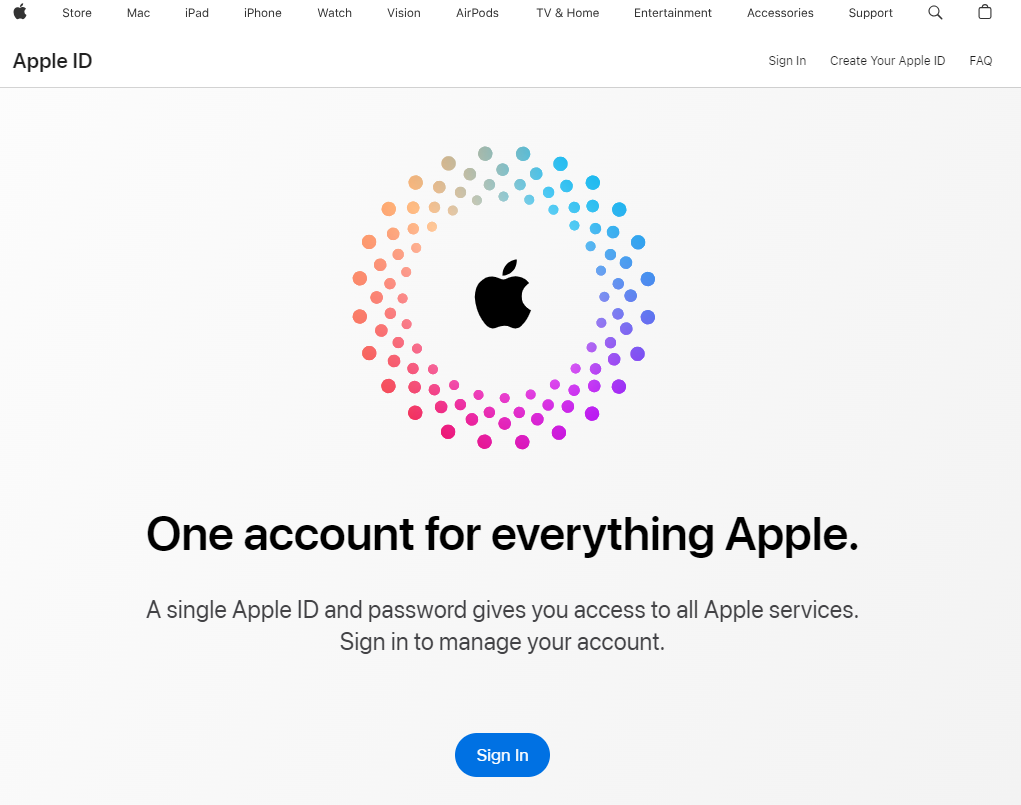
Click or tap on Personal Information.
Then, click or tap on Country/Region.
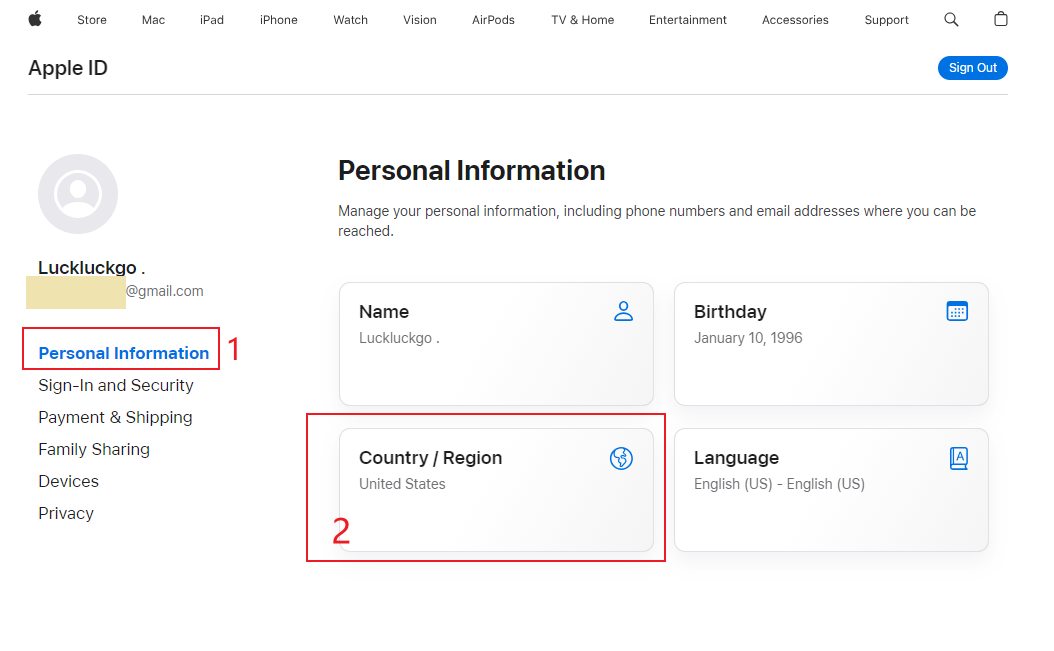
Follow the onscreen instructions to complete the change. Ensure you provide a valid payment method for your new country or region.
Resolving Issues When Changing Your Country or Region
If you're having trouble changing your Apple ID's country or region, follow these streamlined steps to troubleshoot:
Confirm Pre-Change Steps Are Completed
Before modifying your country or region again, ensure you have completed all necessary prerequisites.
Address Family Sharing Complications
Being part of a Family Sharing group could restrict your ability to change your country or region. To amend this:
By visiting Apple's support guide, understand the implications of leaving a Family Sharing group.
If you decide to proceed, follow the instructions to leave the Family Sharing group, then attempt to change your region again.
Seek Assistance from Apple Support
If you've adhered to all the preliminary steps and are still facing difficulties, or if your store credit is less than the cost of the cheapest item, thereby preventing you from spending it:
Reach Out to Apple Support: Visit Apple's support website or contact their help desk directly.
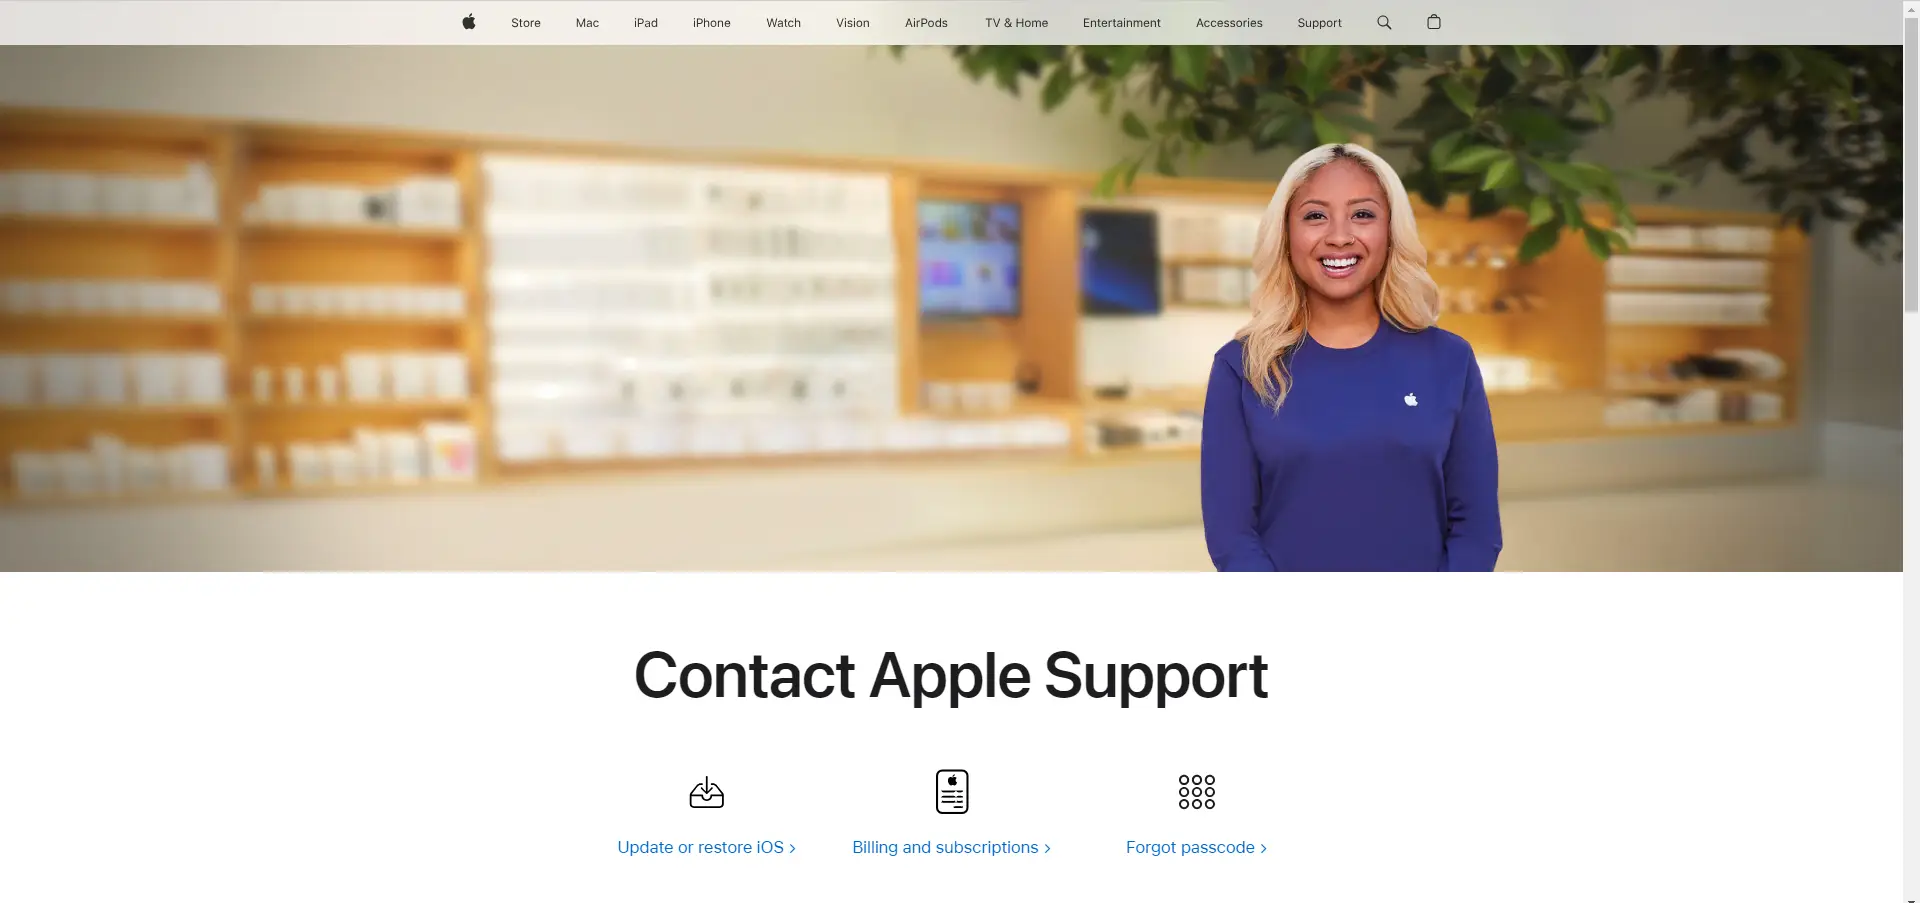
Provide Context: Explain your situation in detail, including the steps you've taken to resolve the issue so they can assist you efficiently.
Recap
In conclusion, changing your iPhone's region for your Apple ID is a straightforward process that can significantly enhance your device's functionality and access to content.
By following the detailed steps outlined, you can easily adjust your region to suit your needs. If you encounter any issues, carefully review the steps and seek Apple Support if necessary. Happy exploring with your newly personalized settings!

